
Step 1: Assemble the Box
Assemble the box as shown in the picture using 1-1/2″ wood screws. Make sure to bury the screws slightly into the wood so you can fill and sand smooth for paint.

Step 2: Add Rails for Shelf
Using wood glue and 1-1/4″ finishing nails, add the two 1x2x46-1/2″ rails that the cedar shelf will sit on 5-1/4″ from the top of the of the box.
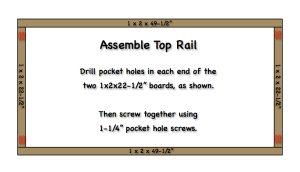
Step 3: Assemble Top Rail
Assemble top rail by first drilling two pocket holes in each end of the 1x2x22-1/2″ boards. Then screw and glue together using 1-1/4″ pocket hole screws and wood glue.
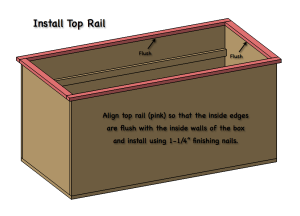
Step 4: Install Top Rail
Align top rail so that the inside edges are flush with the inside edges of the box and nail in place using 1-1/4″ finishing nails.
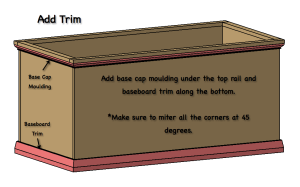
Step 5: Add Trim
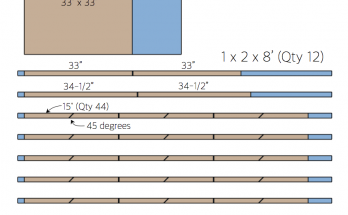
Dress up the hope chest using base cap moulding around the top and baseboard trim around the bottom. Do so by cutting to size and mitering the corners at 45 degrees.
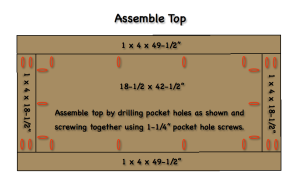
Step 6: Assemble Top
Assemble top by first drilling pocket holes in each end of the 1x4x18-1/2″ boards as well as in the 18-1/2×42-1/2″ plywood as shown. Screw together using 1-1/4″ pocket hole screws. If you’re a perfectionist like I am, you may want to

Step 7: Assemble Cedar Shelf
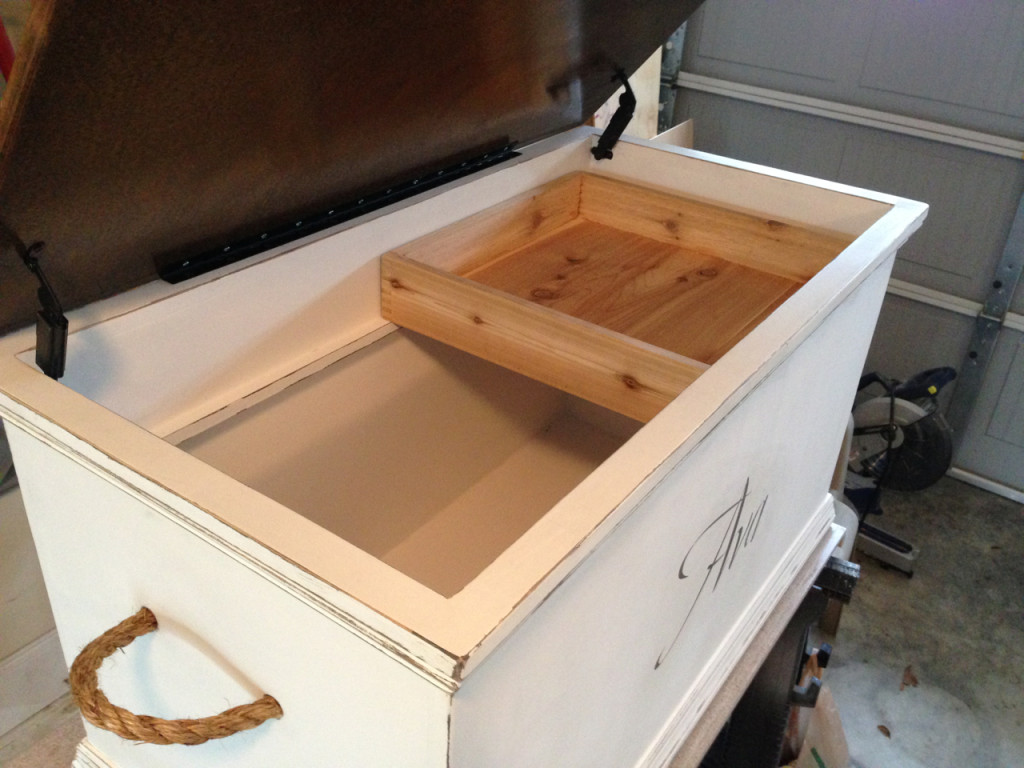
Assemble the cedar shelf by first drilling pocket holes in all the boards as shown. Next, using 1-1/4″ pocket hole screws, screw together the three 1x6x20-3/4″ boards to form the bottom. Now, using 1-1/4″ pocket hole screws, screw the sides together and the bottom to the sides. You may drill slots in the two side to create handles (like a serving tray) if you wish. Note: If your cedar has a rough side, face that side out so the smooth side is the only side shown when the shelf is installed.
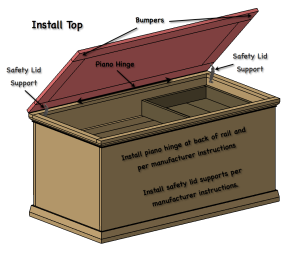
Step 8: Install Hinges, Bumpers and Top
You may want to start by painting your piano hinge an appropriate color. This is optional. You may also want to skip to finishing before completing this step.
First install the piano hinge on the back, top rail of the box and the top per manufacturers instructions. Now install right and left safety hinges per manufacturers instructions. Finally add the bumpers to the corners of the top to prevent the top from rubbing against the chest.
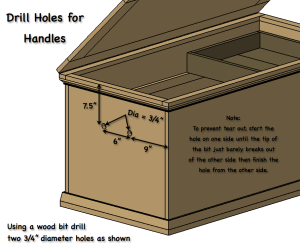
Step 9: Drill Holes for Rope Handles
Using a 3/4″ wood bit, drill two holes in the side panel of the chest. These holes should be 7-1/2″ from the top so that they do not clash with the cedar shelf. Space them 6″ apart; each being 3″ from center. To prevent tear out when drilling, make sure to start the hole from one side and as soon as the tip of the bit barely breaks out of the other side, use that as a location and finish the hole from the other side. Add handles after finishing. To do so, tie a knot as close as possible to the end. Then run the rope through the hole (from inside to out) and back in the other. Adjust to the desired length and tie knot on the inside. Pull firmly on the handle to tighten knots and cut rope as close as possible to the knots.